
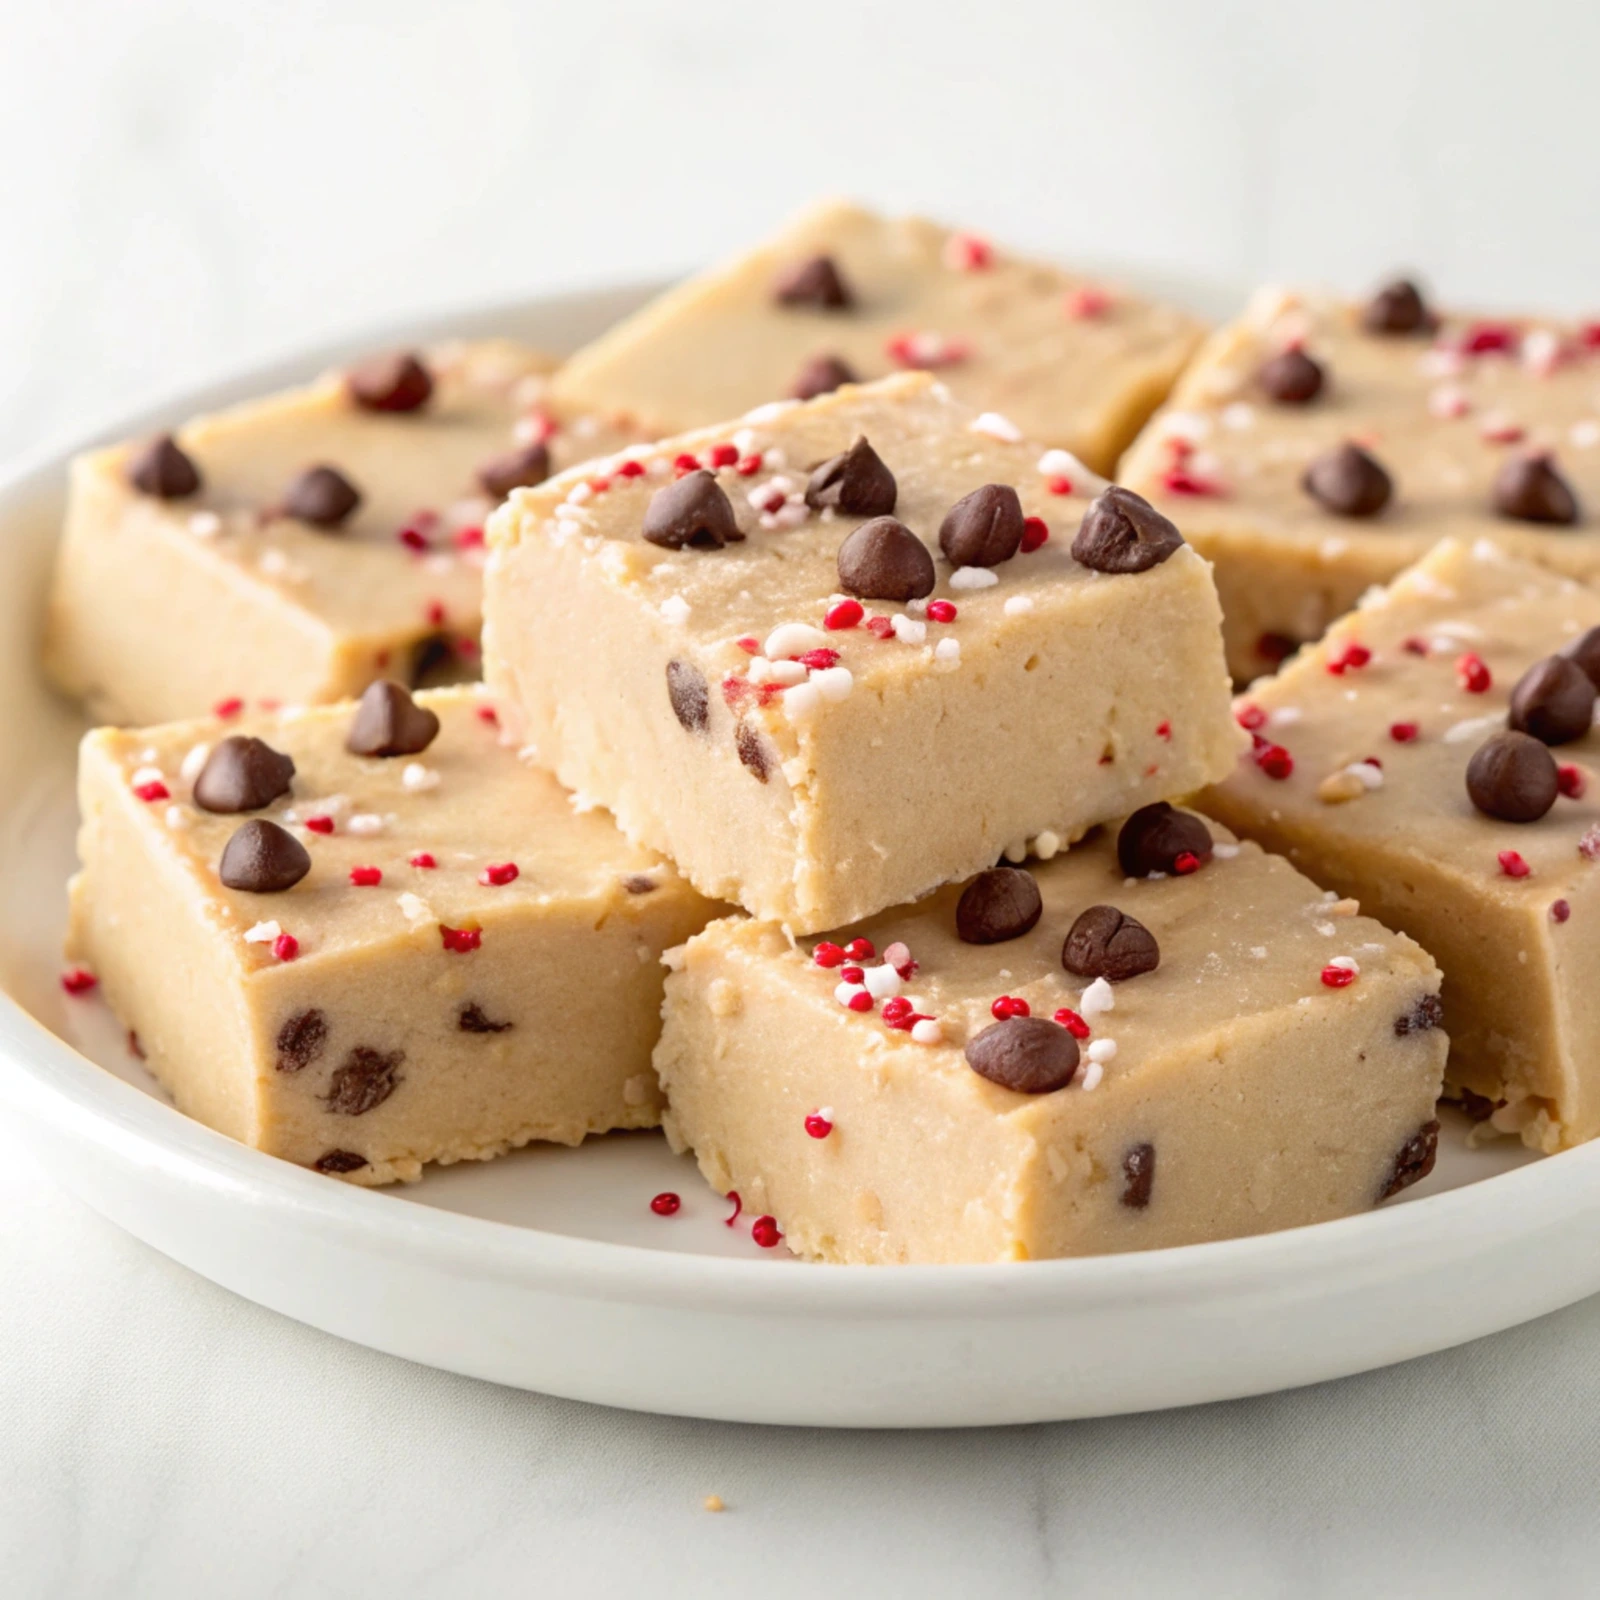
Want a sweet treat that’s easy to make and indulgent? Try 4-ingredient fudge recipes! These treats are great for dessert fans and baking lovers. They’re perfect for quick recipes that use a few ingredients. This guide offers tips, fun ideas, and useful hacks for all. You’ll learn to make creamy, delicious homemade fudge, whether you’re a pro or a beginner.
Jump to Recipe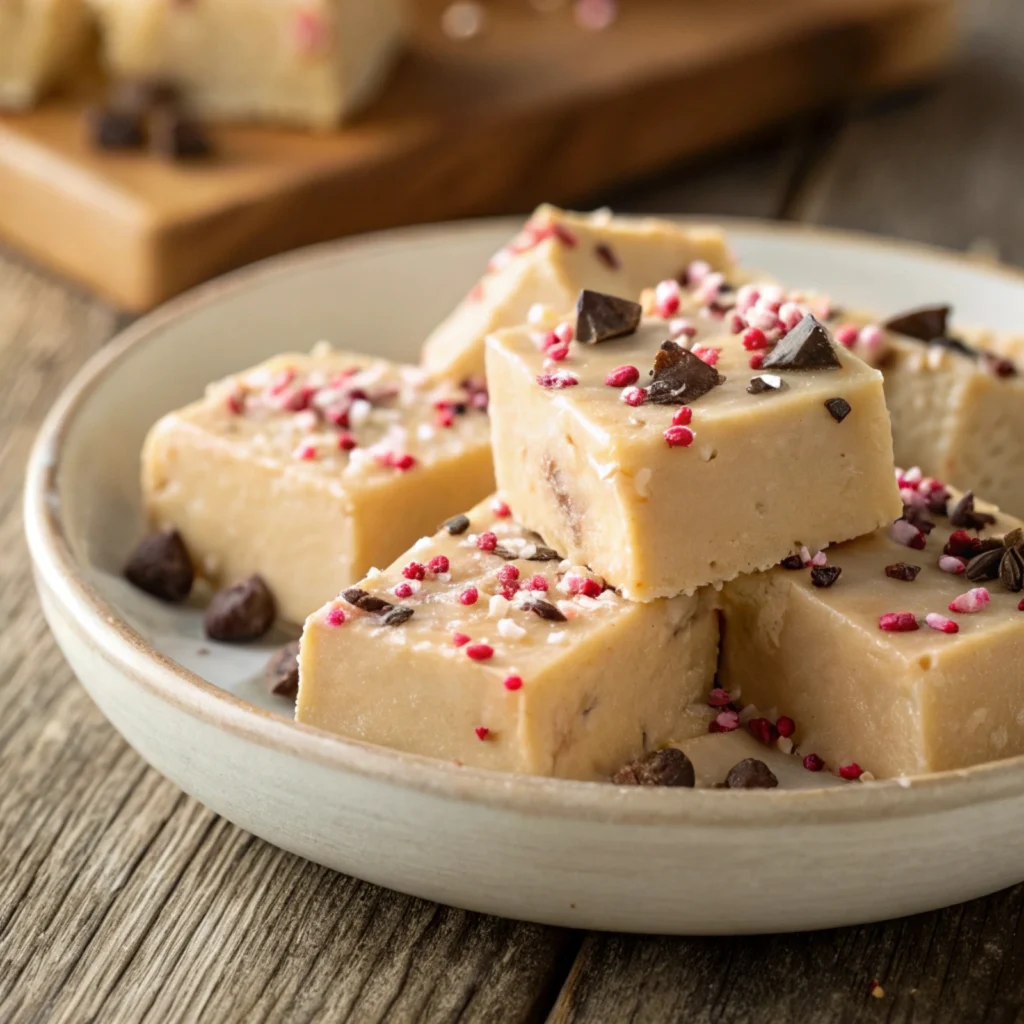
Essential Ingredients Overview
I mean well, what is so magical about 4-ingredient fudge? A perfect combination of simple ingredients for soft, melt-in-your-mouth goodies. As such, here are the essential parts you require:
Chocolate Chips Selection
It all starts with the chocolate: the best fudge is based on high-quality chocolate. Semi-sweet Chocolate Chips have a rich, balanced flavour. Milk chocolate chips are milder and sweeter. White chocolate chips have a creamy vanilla base. It adds a unique twist.
Choosing a Sweetener: Condensed Milk
A rich, creamy fudge combination is the key component of sweetened condensed milk. I always use it because it has a thick, sweet form and holds the rest of the components. It also adds a creamy feel. Opt for full-fat condensed milk, always.
Butter: Salted vs. Unsalted
Fudge is more decadent; you can use butter to enhance its taste . For further control over sweetness and flavour, utilise unsalted butter.
Optional Add-ins: Vanilla or Nuts
Fudge tastes better with vanilla extract; it makes it richer—chopped pecans or walnuts for a crunchy finish.
Step-by-Step Preparation
Fudge preparation is easier than you’d think. Follow these simple steps, and you’ll have homemade fudge ready quickly.
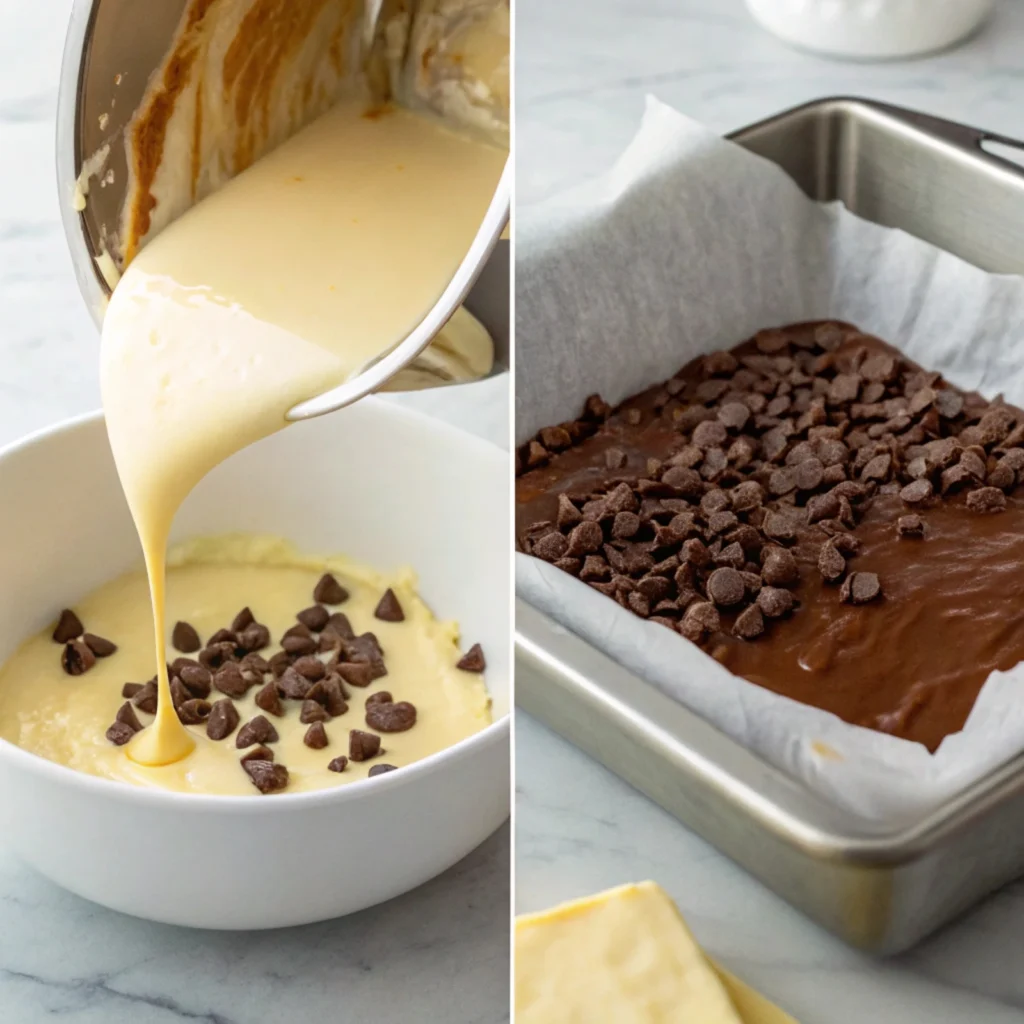
Melting the Chocolate
Start by melting your chocolate chips. Could you place them in a microwave-safe bowl? Heat in 20-second intervals on medium heat. Or, you can use a double boiler for a more controlled method.
Combining Ingredients
Melt your chocolate mixture. Next, mix in the condensed milk and butter. You can also add optional items like vanilla extract. Mix well to achieve a smooth texture.
Pouring and Setting the Fudge
Level the 8-inch square bakery pan with parchment. Leave some overhang for easy removal. Pour the fudge mixture into the pan. Smooth it out with a rubber spatula. Refrigerate for a few hours until it has completely set.
Creative Fudge Variations
Once you know the basics, try mixing in these tasty flavours and twists:
Rocky Road Twist
Mix mini marshmallows, crushed graham crackers, and chopped nuts for a rich, rocky road dessert.
Peanut Butter Fudge Delight
Mix two tablespoons of creamy peanut butter into your fudge base. This adds a rich, nutty flavour. Swirl more peanut butter on top before it sets. This creates a lovely marble effect.
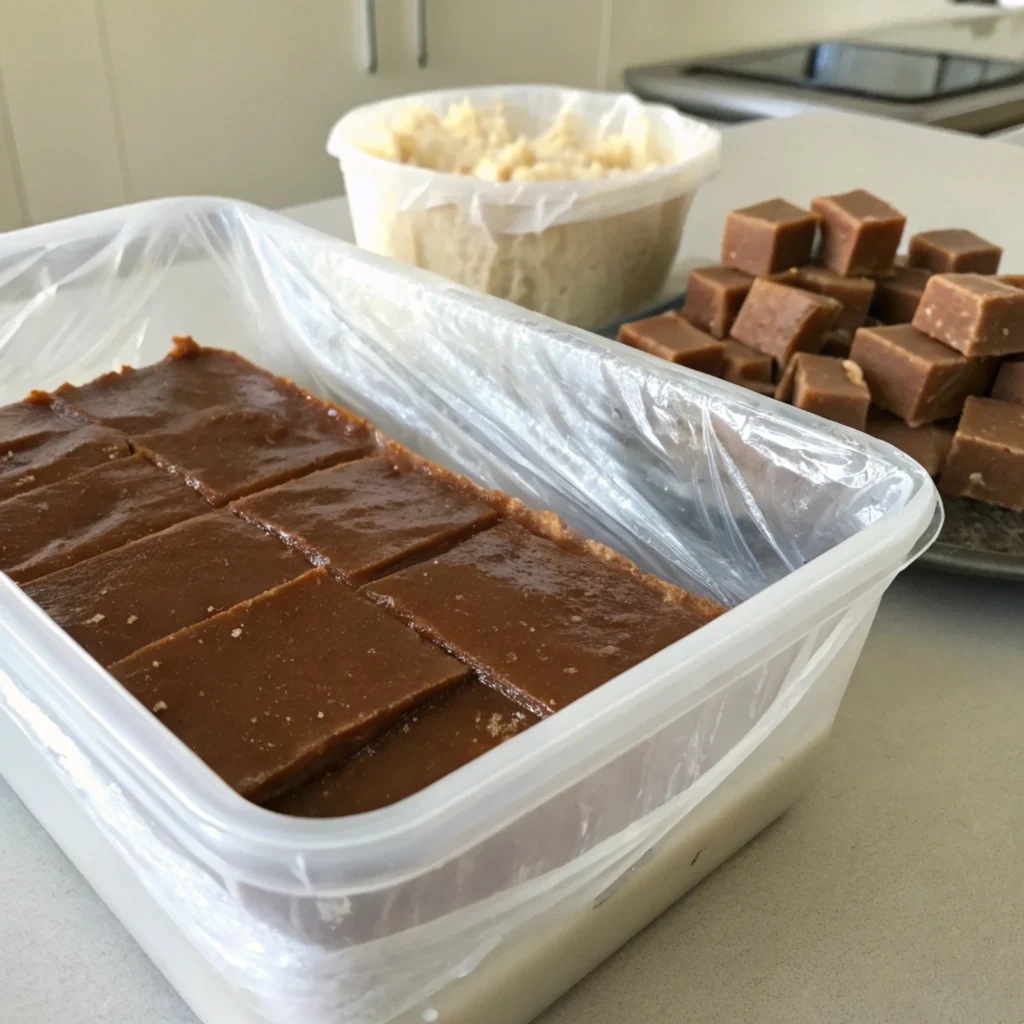
Storage Tips and Tricks
Store your fudge right to keep it creamy and tasty for longer. Here are some handy tips to help you keep your fudge as delicious as the day you made it.
Proper Storage Containers
Always use airtight containers. This keeps fudge from drying out or absorbing smells from other foods. Place parchment paper sheets between layers when stacking items in a container. This stops them from sticking together. Topped fudge, such as with nuts or sprinkles, is very important. It helps keep their shape and texture.
Storage Tips
Place the fondant in an airtight vessel at room temperature for up to one week. You can refrigerate it for two weeks. Please keep it from heat and direct sunlight to keep its creamy texture. For longer storage, freeze the fudge in a flat layer. Wrap it with care in parchment paper and plastic wrap. It may take up to three months before you are ready to enjoy it in the fridge.
Shelf Life Considerations
When kept at room temperature, homemade fudge stays fresh for up to two weeks. Please keep it in a cool, dry place, away from sunlight or heat. These can cause it to melt or change texture.
Wrap each piece in plastic with a firm grip to keep your fudge for over two weeks. Then put them in a bag or a safe freezer container. In the freezer, your fudge can last for up to three months.
When you’re ready to enjoy it, let the fudge thaw at room temperature for a few hours. It will taste as great as when you first made it!
These easy storage tips keep your homemade fudge fresh for weeks or months.
Serving Suggestions
Show off your fudge as the star of your dessert table with these fun ways to present and pair it. A little effort in how you serve it can make a big impression!
Presentation Ideas
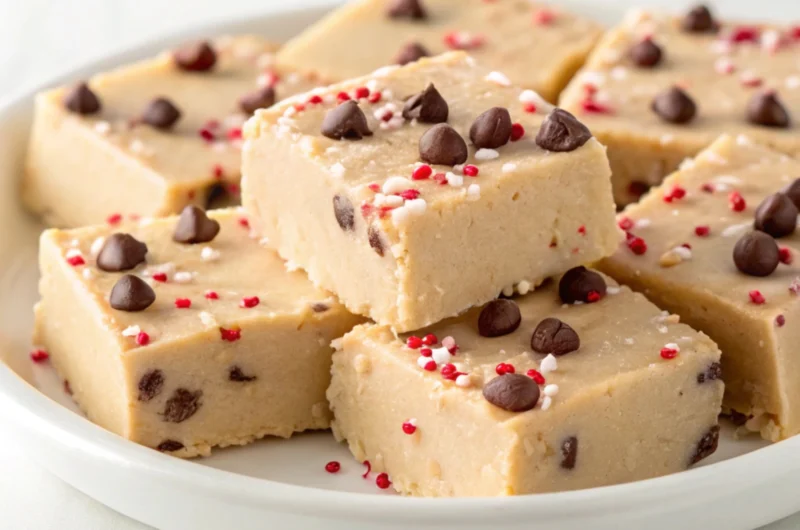
Cut your fudge into even squares for a clean look. Use cookies to create fun shapes such as hearts or stars. For elegance, dust each piece with powdered sugar. Drizzle melted chocolate or caramel on top. Add crushed nuts, sea salt flakes, or edible glitter for extra texture. Arrange your fudge on a decorative platter or stack it on a tiered stand for a great display.
Pairing with Other Desserts
Fudge goes well with many desserts. Serve it with creamy vanilla ice cream for a classic mix. You can also pair it with tart sorbet to balance the sweetness. Pair it with tea, herbal tea, coffee, or hot chocolate. Incorporate fruits such as strawberries or raspberries on your dessert table. They complement the rich chocolate flavours. The options are endless!
Troubleshooting Common Issues
If your homemade fudge isn’t right, don’t stress. Most issues are easy to fix. Here are some tips to help you rescue and perfect your fudge.
Fixing Grainy Texture
Grainy texture occurs when sugar crystals form while preparing the dish. This may happen if you do not mix the mixture completely or if it cools too quickly. To fix graininess, reheat your fudge over low heat while maintaining a gentle temperature. Stir until the aggregate is smooth and the sugar does not dissolve.
To prevent graininess in future batches, ensure the sugar is fully dissolved before you boil. Also, don’t stir the mixture once it begins to boil. Using a damp pastry brush to wash down the sides of the pan can help remove stray sugar crystals.
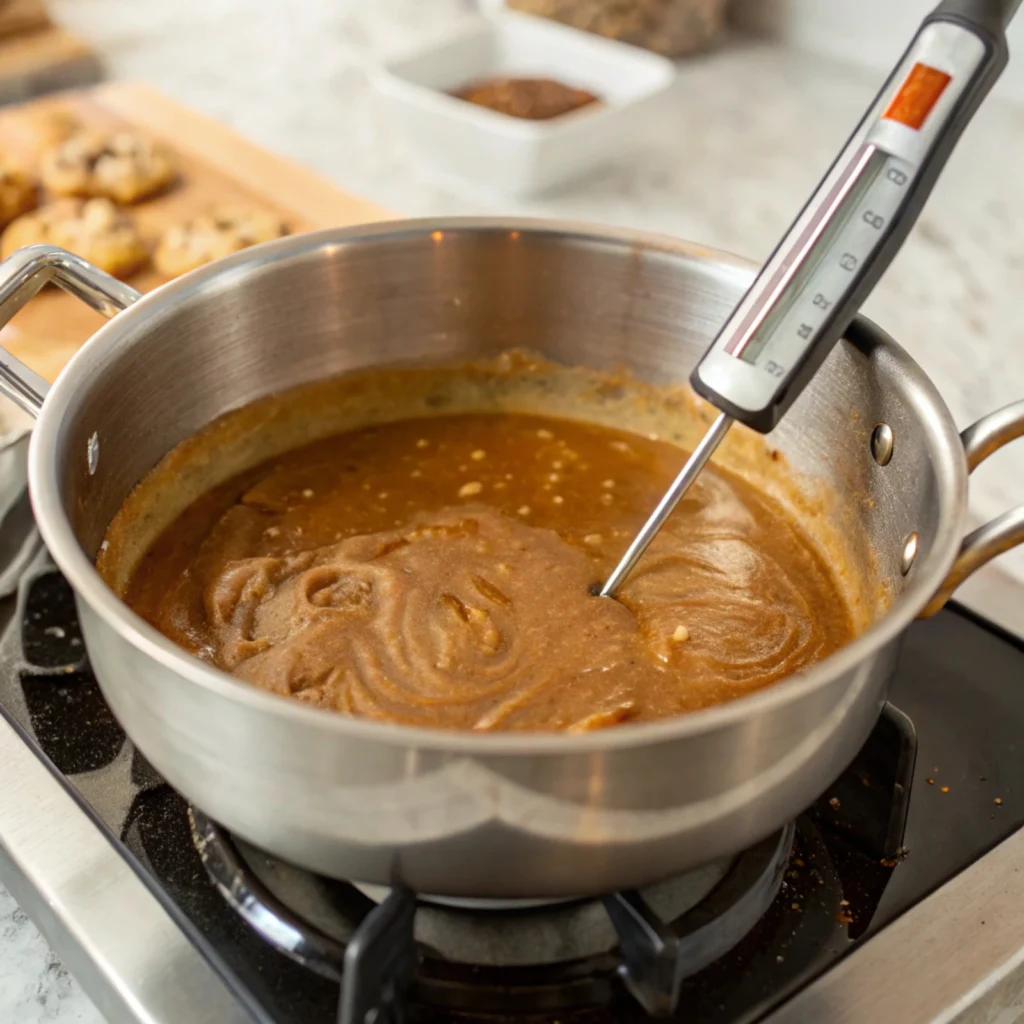
Addressing Fudge That Won’t Set
If your fudge is too soft or won’t set, you might have undercooked it. Reheat the mixture in a saucepan. Use a cookie thermometer to check the temperature. Aim for about 234°F, the “soft ball stage” for proper fudge. Stir gently and consistently to avoid burning the bottom.
If you don’t have a candy thermometer, drop a small amount into cold water. It should form a soft, pliable ball. When the temperature is right, pour the fudge into the prepared pan.
With these tips, your fudge can go from good to irresistible. Enjoy it alone or as part of a dessert spread!
FAQs
Can I Make This Fudge Gluten-Free?
Yes! Most fudge recipes are gluten-free. But always check your ingredients. Examine add-ins such as cookies or sprinkles in detail.
How Do I Store Homemade Fudge?
Store fudge in an airtight container. It lasts up to a week at room temperature. For longer freshness, refrigerate it.
Can I Freeze Fudge?
Certainly! Wrap the individual pieces in parchment, place them in a container in a safe freezer and freeze for up to 3 months.
What’s the Best Way to Cut Fudge?
For clean slices, use a sharp knife warmed under hot water. Wipe the blade between each cut for perfect edges.
Can I Add Extra Flavours?
Yes! Add extracts like vanilla, peppermint, or almond for unique flavours. Spices like cinnamon or nutmeg can also improve your fondant.
What’s the Secret to Creamy Fudge?
The key is low, consistent heat and not overcooking. Stirring constantly ensures a smooth texture.
Can I Use Alternative Sweeteners?
Use coconut sugar, maple syrup, or other natural sweeteners instead of regular sugar. The texture might change a bit.
What Are Some Fun Toppings for Fudge?
Get creative! Try crushed candy canes, sea salt, shredded coconut, mini marshmallows, or chopped nuts for a fun twist.
Sweet Success with 4-Ingredient Fudge
You can make delicious homemade fudge in many flavours. It only takes a few simple ingredients and little effort. Whether it’s a treat for you or a gift, this easy fudge recipe will impress anyone.
Now, roll up your sleeves and get creative! Want more decadent fudge recipes? Check out our recipe card for extra treats, tips, and ideas!
For more tips, variations, and step-by-step instructions, visit the full blog post here.
Irresistible 4-Ingredient Fudge Recipe
Course: DessertCuisine: American116
servings10
minutes120 Per Serving
kcal15
minutesThis classic fudge recipe uses four ingredients. It’s quick and easy for any occasion. With little prep and great flavour, it’s perfect for beginners. Creamy and indulgent, this fudge will be a staple in your collection!
Ingredients
2 cups semi-sweet chocolate chips
1 (14-ounce) can sweetened condensed milk
1 teaspoon vanilla extract
A pinch of salt
Instructions
- Line an 8×8-inch pan with parchment paper. Leave some paper hanging over the brink for smooth elimination.
- Blend the chocolate chips and sweetened condensed milk in a medium saucepan—heat on low. Stir the aggregate until it reaches a melted and clean consistency.
- After turning off the heat, stir in the vanilla extract and a dash of salt.
- Spread the mixture widely after pouring it into the prepared pan using a spatula.
- Refrigerate for approximately 2 hours, or until the fudge is set.
- Using the parchment overhang, remove the fondant from the pan once it has set and cut it into squares.
Recipe Video
Notes
- Add your favourite mix-ins, such as chopped nuts, mini marshmallows, or crushed candy, for extra flavour.